
I love Panamanian tamales! My friend Cedo thought it was time to make some, brought home a bunch of leaves from her farm, and we picked a day to cook together. I have tried to document the process here, hopefully well enough that you all could make them using these directions.
1. – chicken. I have developed a fondness for the gallinas duras (hard chickens) which are much larger chickens. They are tough and take more cooking but have a wonderful flavor. Any chicken can be used though (or any meat that you prefer). To save time on tamale day, I cooked the chicken ahead of time.
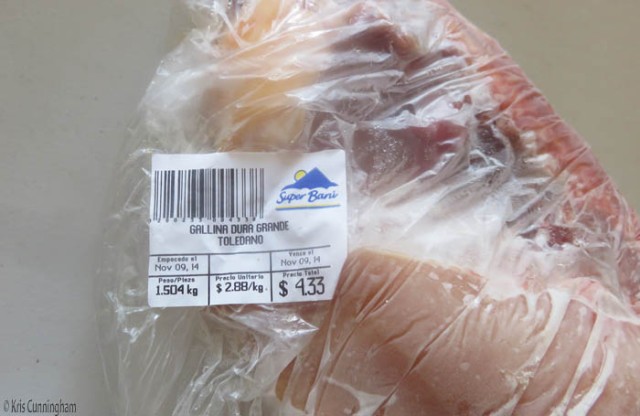
This is half a chicken and it’s over 6 pounds.
A pressure cooker is a very useful thing. I put the chicken in the pressure cooker with about 4 cups of water, a chopped onion, a few sliced cloves of garlic, a couple Maggi bouillon cubes, a few culantro leaves, a handful of chopped peppers (the small ones – sweet, not hot), and a pouch of tomato sauce.


When the chicken was cool enough to handle I took the meat off the bones and put it in the fridge. Then I put the juice or broth in another container and put it in the fridge as well.
2. – corn. Tamales are usually made with maiz seco (dry corn – looks like chicken food. Boil in water until softened and proceed as with fresh corn). I really like maiz nuevo (new corn or fresh corn). It’s a bit more work but I think it is worth it.
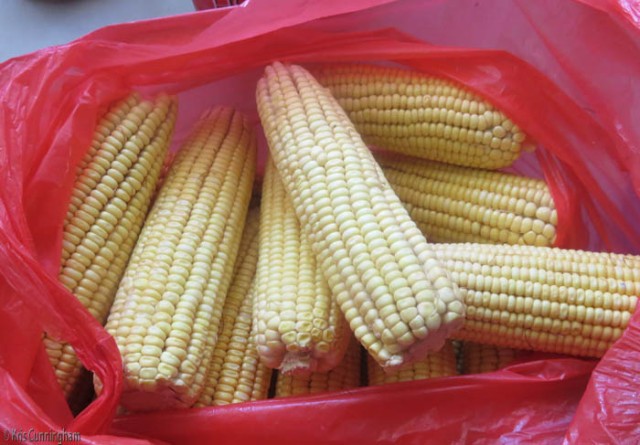
Maiz nuevo – it can be found in most of the little produce markets, but I have found the best deal is to buy it from someone selling it out of their truck ($0.15/ear). There always seem to be a few trucks by the side of the road that goes north just west of the old McDonalds. This looks like the sweet corn in the US but it is not. We don’t have those long days here that it needs to get sweet, but when used in Panamanian cooking I think it is really good.
The sellers will give you corn without the husk, but it is your job to clean off the silk, cut the corn off the cobs, and run it through the grinder. Last time we made tamales, Cedo cooked peppers, onion, and culantro in some oil and then broth, and put that all in the blender. This time though she showed me how to proceed without a blender. Just put the peppers, onion and culantro in the grinder along with the corn. This seemed easier and faster and had great results, so I think I will use this method in the future.


3. Prepare the leaves – The inner wrapping is plantain leaves. They need to be cut to manageable size and boiled to soften them. This is where it is nice to have two people. One can be washing, cutting, and boiling leaves while the other grinds the corn. The plantain leaves are rolled into a bundle and boiled in a pot of water. When one end is soft, turn the bundle other end up to soften the other end. The outer leaves are bijao. They only need to be washed, the stems trimmed, and heated quickly to soften. After the plantain leaves are boiled, that hot water is good for dipping the bijao leaves.


(If leaves are unavailable, tamales can be made in tinfoil packets. The plantain leaves add an interesting flavor though, so use them if you have them. )
4. Put the broth in the ground corn – the broth was retrieved from the fridge and heated on the stove. Cedo is quite efficient in the kitchen and while I was busy grinding, she had the broth ready before I had a chance to watch exactly what she did. I know she flavored it up more with the red sauce and the adobo seasoning and when it passed the taste test, she also added oil (I’m guessing about 1/2 cup). When we made tamales before she added oil until the corn was “brillante” (shiny), and told me this is important to keep it from sticking to the leaves when it is cooked.


5. Prepare the meat and garnish – tamales also contain chicken meat and an attractive garnish of onions, peppers, and tomatoes. The veggies are chopped and sauteed in oil until soft. Before, slices of meat were added separately when the tamales were assembled, but this time shredded chicken was added to the veggies when they were cooked, and all was sauteed together for a minute or two. When we finished this part we realized we had forgotten the tomatoes. We decided at this point we didn’t want to backtrack and the tamales would be fine without them.


6. Assemble and cook tamales – At this point you have your leaves (and some string), your corn filling, and your meat/vegetable garnish. Put a pot or two of water on the stove to boil (depending on how many tamales you are making) and start putting them together.


Put the tamales in the boiling water. After 20-30 minutes when the lower part is no longer green, turn them over so the green part is down in the water. Continue cooking another 10-20 minutes until the wrapping is “chocolate” and there is no more green. Don’t worry about over cooking because that does no harm.
Then, take them out, open one, and eat a tamale!
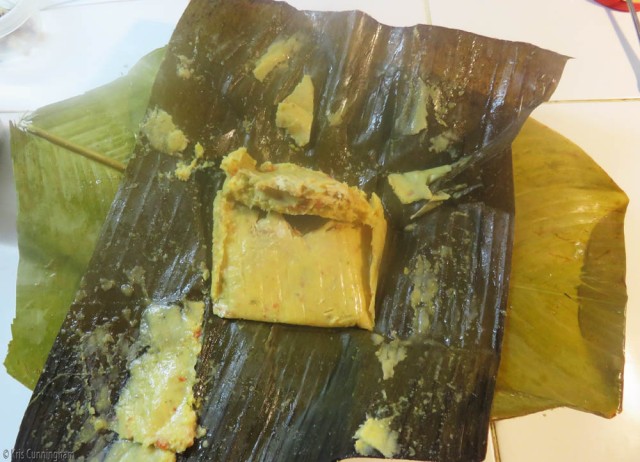
Yeah! The corn that was a bit soupy is now fairly solid and covers the chicken and garnish. But, it is there in the middle.
Tamales keep well in the fridge for probably up to a week. They can also be frozen. I was told that they come out as good as new when thawed, but none have lasted long enough to get frozen here. Cedo says they should be warmed in hot water, or a covered frying pan with some hot water. The microwave will make them gummy. I warm them in the microwave and they seem to do fine, but I am careful to only heat them as much as necessary and not overheat.
Thank you for bearing with me through this long post. Some people have suggested that a book of Panamanian recipes would be an interesting thing to put together. This is a bit of an attempt in that direction. I see I need measured amounts, an ingredient list, better photos, and I must watch Cedo more closely so I don’t miss any steps. But, Cedo has recipes handed down in her family for generations, she is an experienced cook (had her own restaurant for many years), and in this digital age it can’t be that hard to put together an e-book. So, we shall see.
I am open to suggestions so leave me a comment if you see something that can be improved. If any of you can use these directions to make your own tamales, I will be very excited! (and, of course, happy to “test” your results if possible 😀 )


YES to the coming cook book. I will buy the first one off the press. Having had some of Cedo’s tamales, I can attest to their goodness. Great post kris.
LikeLike
We shall see about the book. You know how I have developed this allergy to work, but it does seem like a fun project (and of course one can never have enough projects 😀 )
LikeLike
Delicious post!
LikeLike
Thanks 🙂 When you get here, we will eat tamales together!
LikeLike
Thanks for the beautiful photos and directions. Looks like a lot of work, but I am sure they are worth the effort.
LikeLike
WOW, Kris, that looks like a lot of work but I am sure they are very tasty and worth the effort. Thanks for your detailed and photographed preparation of this wonderful dish. Kat
LikeLike
It is a bit of work but well worth it. Also it is a social thing. Usually the women all get together to make them for a holiday or special occasion, and have fun together in the process. Thanks for stopping by, glad you enjoyed the post 🙂
LikeLike
Hi Kris! THANK YOU for sharing this fun experience with us! A cook book would be delightful…but sharing through your eyes/words was the best! I am anticipating a two week trip to
Panama next year to determine where I would like to spend 6 to 12 months the following year. I will definitely visit David! Do you have recommendations for other sites to connect with ex-pats there and perhaps find a rental for my upcoming visit? I truly enjoy your blog!!
LikeLike
Thanks! Glad you enjoyed the post.
You might find some helpful info on my links page http://www.thepanamaadventure.com/links.html
LikeLike
I think I can smell them cooking!!! I’m definitely saving this recipe. Thanks, Kris. You should write a cookbook. I’d buy it. 🙂
LikeLike
They are good, but I also love your nacatamales! They are next on my agenda.
LikeLike
Nailed it! Great post. One of another of my neighbors make tamales every couple of weeks. They cook them in “fogons” which are large iron pots and most of the houses around here have a spot in the back yard where they cook over a wood fire. There’s just something special about cooking them this way…a little smoky flavor seeps in. Pebas, the things that look like acorns on steroids, are also cooked this way and are delicious. When tamale days are over they always come down to my houe and drop one or two off to me
LikeLike
Good for you, that you get to enjoy the tamales too. I need a fagon! I need to talk to my friend the welder again. He has a metal table with some big stones to hold the pot, works great and you can move it if you need to. There is nothing like a wood fire to give everything a wonderful flavor.
LikeLike
Those look delicious!! I hope you are doing well :).
LikeLike
They are, and we’re doing great thanks. I hope all is well with you too!
LikeLike
Reblogged this on 4sarge and commented:
Mmmmmh, Tamales
LikeLike
Yep, good stuff, and thanks for the reblog
LikeLike
This is awesome! And you know I am in favor of the cookbook idea. I know many people like the specifics of measuring cups but after cooking with Cedo I see that is just not necessary. You put in as much of something as you think is good based on your own tastes, and less of stuff you like less. If it requires a certain amount to turn out right then I’d be in favor of measuring cups but I like the cultural experience of winging it. Are empanadas next? 🙂
LikeLike
Empanadas are tomorrow! I know what you mean about measuring, but it probably would be good to have a starting point for amounts though, and then people can go from there adjusting for their own tastes.
LikeLike
Chris this is fabulous. You are really embracing the Panamanian culture and isn’t that what it’s all about? Great job. They look delicious.
LikeLike
Cooking together is about more than just the food, so it is a great way to learn all sorts of things. And, with such a good teacher we get some really good food too!
LikeLike
Sorry. Spelled your name wrong. Oops! Promise I won’t do that again!
LikeLike
No problem 🙂
LikeLike
Looks yummy!!! We love reading your posts! We are in the planning stages of the move and your posts give us so much insight into how life can be there. We are so excited, thank you for sharing your experiences!
LikeLike
Thank you so much 🙂 I’m really glad you enjoy the blog. How exciting that you are going to be here too!
LikeLike