I love Panamanian tamales! My friend Cedo thought it was time to make some, brought home a bunch of leaves from her farm, and we picked a day to cook together. I have tried to document the process here, hopefully well enough that you all could make them using these directions.
1. – chicken. I have developed a fondness for the gallinas duras (hard chickens) which are much larger chickens. They are tough and take more cooking but have a wonderful flavor. Any chicken can be used though (or any meat that you prefer). To save time on tamale day, I cooked the chicken ahead of time.
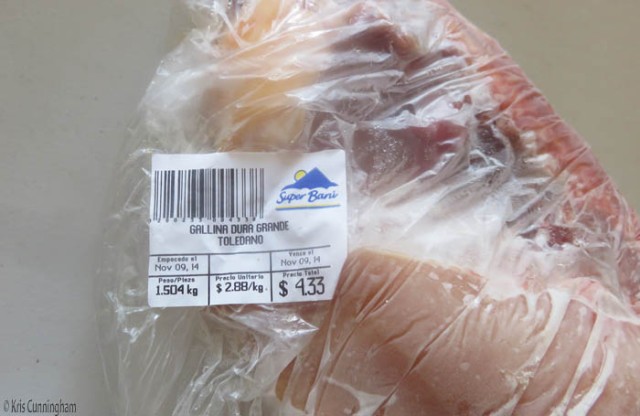
This is half a chicken and it’s over 6 pounds.
A pressure cooker is a very useful thing. I put the chicken in the pressure cooker with about 4 cups of water, a chopped onion, a few sliced cloves of garlic, a couple Maggi bouillon cubes, a few culantro leaves, a handful of chopped peppers (the small ones – sweet, not hot), and a pouch of tomato sauce.

I just tossed the chicken in the pot whole, skin and all. This is two of those big half chickens, but we had enough left over chicken that I think one would have been enough.

Chicken with onion, garlic, culantro, and peppers for flavor.

These are the little peppers. Sometimes they are partly green, or all green but they all the same kind of pepper.

A couple option for pouches of tomato sauce.

Ready to cook

After an hour in the pressure cooker the meat was falling off the bones, and it smelled wonderful!
When the chicken was cool enough to handle I took the meat off the bones and put it in the fridge. Then I put the juice or broth in another container and put it in the fridge as well.
2. – corn. Tamales are usually made with maiz seco (dry corn – looks like chicken food. Boil in water until softened and proceed as with fresh corn). I really like maiz nuevo (new corn or fresh corn). It’s a bit more work but I think it is worth it.
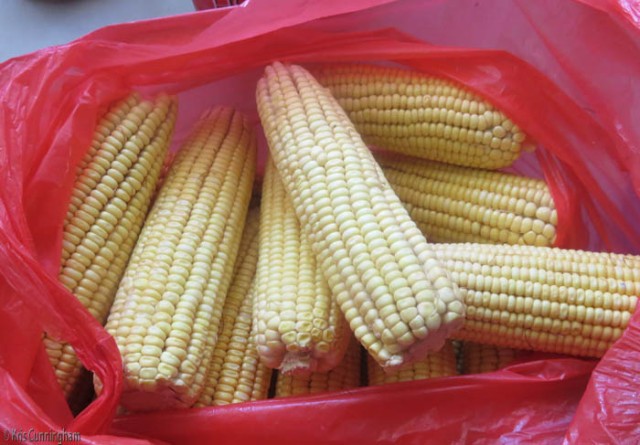
Maiz nuevo – it can be found in most of the little produce markets, but I have found the best deal is to buy it from someone selling it out of their truck ($0.15/ear). There always seem to be a few trucks by the side of the road that goes north just west of the old McDonalds. This looks like the sweet corn in the US but it is not. We don’t have those long days here that it needs to get sweet, but when used in Panamanian cooking I think it is really good.
The sellers will give you corn without the husk, but it is your job to clean off the silk, cut the corn off the cobs, and run it through the grinder. Last time we made tamales, Cedo cooked peppers, onion, and culantro in some oil and then broth, and put that all in the blender. This time though she showed me how to proceed without a blender. Just put the peppers, onion and culantro in the grinder along with the corn. This seemed easier and faster and had great results, so I think I will use this method in the future.

Corn, ready for the grinder.

Cedo tossed a couple handfuls of seeded and cored peppers in the grinder.

Then came an onion

and more culantro

A colorful mix is coming out of the grinder.

All ground and ready for the next step.
3. Prepare the leaves – The inner wrapping is plantain leaves. They need to be cut to manageable size and boiled to soften them. This is where it is nice to have two people. One can be washing, cutting, and boiling leaves while the other grinds the corn. The plantain leaves are rolled into a bundle and boiled in a pot of water. When one end is soft, turn the bundle other end up to soften the other end. The outer leaves are bijao. They only need to be washed, the stems trimmed, and heated quickly to soften. After the plantain leaves are boiled, that hot water is good for dipping the bijao leaves.

The bundle of plantain leaves boiling on the stove.

Dipping bijao leaves in the hot water to soften them.
(If leaves are unavailable, tamales can be made in tinfoil packets. The plantain leaves add an interesting flavor though, so use them if you have them. )
4. Put the broth in the ground corn – the broth was retrieved from the fridge and heated on the stove. Cedo is quite efficient in the kitchen and while I was busy grinding, she had the broth ready before I had a chance to watch exactly what she did. I know she flavored it up more with the red sauce and the adobo seasoning and when it passed the taste test, she also added oil (I’m guessing about 1/2 cup). When we made tamales before she added oil until the corn was “brillante” (shiny), and told me this is important to keep it from sticking to the leaves when it is cooked.

Red sauce, adobo, and vegetable oil.

Broth warming on the stove with some bits of meat and veggies that were cooked with the chicken. We ended up using about half of this (maybe 3-4 cups). The rest made a great soup later.

Adding broth to the corn. Cedo says it must be warm because it results in fluffier and softer corn.

Stir in the broth and the filling will be ready.
5. Prepare the meat and garnish – tamales also contain chicken meat and an attractive garnish of onions, peppers, and tomatoes. The veggies are chopped and sauteed in oil until soft. Before, slices of meat were added separately when the tamales were assembled, but this time shredded chicken was added to the veggies when they were cooked, and all was sauteed together for a minute or two. When we finished this part we realized we had forgotten the tomatoes. We decided at this point we didn’t want to backtrack and the tamales would be fine without them.

She sauteed onions, some red peppers, and a bit of green pepper in some oil.

Add the shredded chicken

Ready for assembly
6. Assemble and cook tamales – At this point you have your leaves (and some string), your corn filling, and your meat/vegetable garnish. Put a pot or two of water on the stove to boil (depending on how many tamales you are making) and start putting them together.

Cedo used a small frying pan as a base

Put a bijao leaf in the pan, and then a plantain leaf on top

Put a couple spoonfuls of the corn mixture in the middle

Then, put on some of the chicken and garnish mixture

Fold the top down, the bottom up, and then the sides in

Then, fold in the sides of the bijao

Fold the top down

the bottom up

snip of the stem end with scissors to make a neat package

Tie with string, and they are ready to go in the pot

Tamales in the pots. Notice the ones in the bigger pot are looking more cooked, while the others that hadn’t been cooking as long still have parts that look bright green.
Put the tamales in the boiling water. After 20-30 minutes when the lower part is no longer green, turn them over so the green part is down in the water. Continue cooking another 10-20 minutes until the wrapping is “chocolate” and there is no more green. Don’t worry about over cooking because that does no harm.
Then, take them out, open one, and eat a tamale!
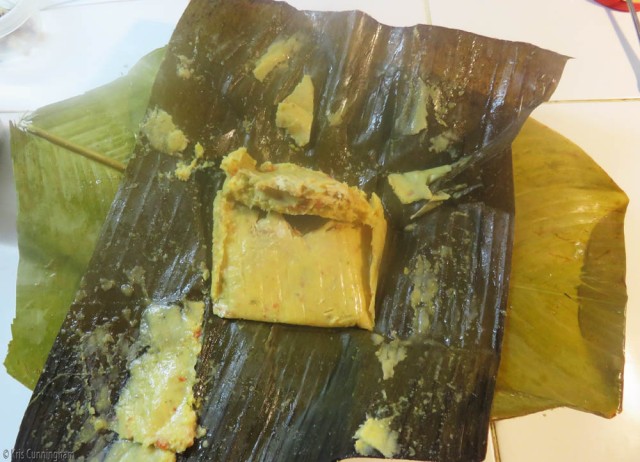
Yeah! The corn that was a bit soupy is now fairly solid and covers the chicken and garnish. But, it is there in the middle.
Tamales keep well in the fridge for probably up to a week. They can also be frozen. I was told that they come out as good as new when thawed, but none have lasted long enough to get frozen here. Cedo says they should be warmed in hot water, or a covered frying pan with some hot water. The microwave will make them gummy. I warm them in the microwave and they seem to do fine, but I am careful to only heat them as much as necessary and not overheat.
Thank you for bearing with me through this long post. Some people have suggested that a book of Panamanian recipes would be an interesting thing to put together. This is a bit of an attempt in that direction. I see I need measured amounts, an ingredient list, better photos, and I must watch Cedo more closely so I don’t miss any steps. But, Cedo has recipes handed down in her family for generations, she is an experienced cook (had her own restaurant for many years), and in this digital age it can’t be that hard to put together an e-book. So, we shall see.
I am open to suggestions so leave me a comment if you see something that can be improved. If any of you can use these directions to make your own tamales, I will be very excited! (and, of course, happy to “test” your results if possible 😀 )